
Best Printing Calculators to Buy in July 2026
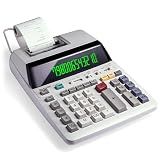
Sharp EL-1801V Ink Printing Calculator, 12-Digit LCD, AC Powered, Off-White, Ideal for Business & Office Use, Easy-to-Read Display & Durable Design
-
FAST, COMFORTABLE KEYS: EXPERIENCE TYPING WITHOUT FATIGUE OR ERRORS.
-
QUICK, CLEAR PRINTING: COLOR-CODED OUTPUTS ENSURE EASY AND INSTANT READING.
-
DURABLE & USER-FRIENDLY: LONG-LASTING DESIGN WITH SIMPLE MAINTENANCE NEEDS.


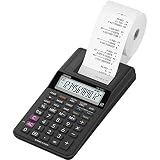
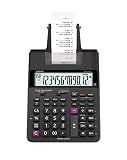
Casio HR-10RC Mini Desktop Printing Calculator | Portable | 12-Digit Display | One-Color Printer | Tax & Currency | Ideal for Taxes, Bookkeeping & Accounting Tasks, Black
- COMPACT & PORTABLE: MINI DESIGN WITH RUBBER KEYS FOR EASY ON-THE-GO USE.
- BIG DISPLAY: 12-DIGIT LCD SCREEN FOR QUICK, ACCURATE CALCULATIONS.
- VERSATILE FUNCTIONS: TAX, CURRENCY, AND COST CALCULATION FOR EFFICIENT FINANCE.
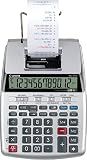
Canon P23-DHV-3 Printing Calculator with Double Check Function, Tax Calculation and Currency Conversion - Paper Roll Included in Box
- INBUILT PRINTER: TRACK CALCULATIONS INSTANTLY WITH DURABLE ROLLER PRINTER.
- 12-DIGIT LCD: CLEAR DISPLAY FOR EASY VIEWING AND FAST CALCULATIONS.
- VERSATILE FUNCTIONS: STREAMLINE FINANCES WITH CURRENCY, TAX, AND COUNTERS.
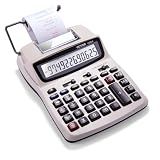
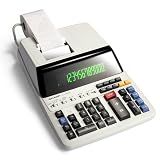
Victor Printing Calculator, 1208-2 Compact and Reliable Adding Machine with 12 Digit LCD Display, Battery or AC Powered, Includes Adapter,White
- LARGE 12-DIGIT DISPLAY FOR CLEAR, EASY CALCULATIONS.
- FAST 2.3 LINES/SECOND PRINTER FOR QUICK, RELIABLE RECEIPTS.
- ECO-FRIENDLY DESIGN WITH 20% RECYCLED PLASTIC MATERIAL.
Casio HR-170RC Plus – Mini Desktop Printing Calculator | Check & Correct, Cost/Sell/Margin, Dual-Color Print | Ideal for Taxes, Bookkeeping & Accounting Tasks, Assorted Colors
- FAST DUAL-COLOR PRINTING FOR QUICK DISTINCTION OF KEY VALUES.
- REVIEW AND CORRECT 150 STEPS FOR EFFICIENT, ACCURATE DOCUMENTATION.
- COMPREHENSIVE TAX AND BUSINESS FUNCTIONS STREAMLINE FINANCIAL TASKS.
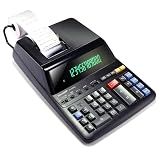
Sharp EL-1197PIII Heavy Duty Color Printing Calculator with Clock and Calendar
- FAST, QUIET PRINTING: 4.5 LINES/SEC, PERFECT FOR BUSY OFFICES.
- EYE-FRIENDLY DISPLAY: BRIGHT, CLEAR PRINTOUTS REDUCE EYE STRAIN.
- USER-FRIENDLY DESIGN: INTUITIVE KEYS, NO LEARNING CURVE REQUIRED.
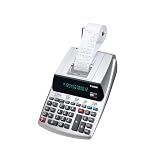
Canon Office Products 2198C001 Canon MP11DX-2 Desktop Printing Calculator with Currency Conversion, Clock and Calendar
- COMPACT DESIGN FITS BUSY PROFESSIONALS AND TAX TIME NEEDS!
- DOUBLE CHECK FUNCTION ENSURES ACCURACY IN EVERY CALCULATION.
- PROFIT MARGIN KEYS SIMPLIFY PRICING AND DISCOUNT CALCULATIONS!

Sharp EL-1750V Two-Color Printing Calculator 2 Lines/Sec 3" Black/Red
- EXTRA LARGE LCD FOR EASY VIEWING AND QUICK DATA ACCESS.
- FAST 2.2 LINES-PER-SECOND PRINTING BOOSTS EFFICIENCY.
- ONE-TOUCH KEYS FOR QUICK CALCULATIONS AND MARGIN TRACKING.
Sharp 12-Digit Print Calculator Desktop Size Adding Machine, Perfect for Everyday Use and Office, Bright, Large Easy-to-Read Numbers on Both the Display and the Two-ColorPrinted Tape (EL2196BL)
- FAST OUTPUT: 3.7 LINES/SEC WITH CRISP BLACK/RED PRINTOUTS-EASY READING!
- BRIGHT DISPLAY: HIGH-CONTRAST DIGITS ENSURE CLARITY IN ANY LIGHTING.
- ERGONOMIC DESIGN: CURVED KEYS FOR SPEED AND COMFORT, PREVENTING FATIGUE.
Casio HR-170RC Printing Calculator, Black, 2.6" x 6.5" x 11.6"
- EFFORTLESS RE-PRINT DUPLICATES WITH A SINGLE CLICK.
- PRINT CORRECTIONS INSTANTLY FOR FLAWLESS DOCUMENTS.
- ENSURE ACCURACY WITH 150-STEP CHECK AND CORRECTION FEATURE.
To set the date and time on a printing calculator, follow these steps:
- Turn on the calculator by pressing the power button.
- Look for a key or button labeled "Clock" or "Time/Date." Press this button to access the date and time settings.
- Use the number keys on the calculator to enter the current date. For example, if the current date is June 10th, 2022, enter "0-6-1-0-2-2."
- Press the "." or "/" key (if available) to separate the day, month, and year digits.
- Use the "+" or "-" key (if available) to adjust the cursor or move to the next field. Use the number keys to set the month and year accordingly.
- Once the date is accurately set, press the "Enter" or "Clock" button to confirm and move to the time settings.
- Enter the current time using the number keys. For example, if the current time is 11:30 AM, enter "1-1-3-0."
- If the calculator uses the 24-hour format, press the "#" or "AM/PM" key (if available) to switch to the correct format.
- Use the "+" or "-" key (if available) to adjust the cursor or move to the next field. Use the number keys to set the hour and minutes accurately.
- Once the time is set correctly, press the "Enter" or "Clock" button to confirm the settings.
- The calculator will now display the updated date and time, and it will use these settings for future calculations and printing.
Note: The steps provided above are general instructions and may vary slightly depending on the specific model and brand of your printing calculator. It is recommended to refer to the user manual for precise instructions tailored for your device.
What is the maximum paper width that can be used on a printing calculator?
The maximum paper width that can be used on a printing calculator is typically 2.25 inches (57 mm). However, there may be variations depending on the specific model and manufacturer. It is always advisable to check the product specifications or user manual for accurate information.
How to toggle daylight saving mode on a printing calculator?
The process of toggling daylight saving mode on a printing calculator may vary depending on the specific model and brand. However, the general steps to enable or disable daylight saving mode are as follows:
- Check the user manual: Refer to the user manual specific to your printing calculator to identify the exact instructions for toggling daylight saving mode. The manual will provide step-by-step guidance based on the specific model.
- Locate the settings button: Most printing calculators have a settings button labeled "SET" or "MODE." Find this button on your calculator, typically located near the display screen.
- Enter the settings menu: Press and hold the settings button for a few seconds until the calculator enters the settings menu. The screen may display a symbol like a gear or a wrench.
- Navigate to time settings: Look for a menu option related to time settings. This option could be labeled "TIME," "CLOCK," or "DATE/TIME." Use the arrow keys or navigation buttons on the calculator to reach the desired option.
- Enter daylight saving mode submenu: Once you have selected the time settings menu option, you may need to navigate further to locate the daylight saving mode submenu. It could be labeled as "DST" or "SUMMER TIME."
- Enable or disable daylight saving mode: Use the arrow keys or navigation buttons to select the daylight saving mode submenu. Then, toggle the mode by pressing the designated button, which will either be labeled "ON/OFF," "+/-," or "ENABLE/DISABLE." Make sure to choose the desired option based on your requirement.
- Save the changes: After enabling or disabling daylight saving mode, exit the settings menu on your calculator. Often, this can be accomplished by pressing the settings button again or by selecting an "EXIT" or "DONE" option.
Remember to consult your calculator's user manual if the above steps don't apply or if additional steps are required.
What is the benefit of having a built-in clock on a printing calculator?
There are several benefits of having a built-in clock on a printing calculator:
- Time and Date Stamp: The built-in clock allows the printing calculator to display the current time and date. This feature is particularly useful for businesses or individuals who need to document and track their financial transactions accurately. The time and date stamp on printed receipts or calculations can help with record keeping and provide a clear audit trail.
- Efficiency in Time-Sensitive Transactions: For businesses involved in time-sensitive transactions, such as invoicing or billing, the built-in clock enables precise time tracking. It helps users calculate and print time-specific data, ensuring accurate calculations and reducing errors in time-sensitive operations.
- Calculation Accuracy: The clock's time data can be utilized to perform specific calculations like finding elapsed time or time differences between two events. By using the internal clock, the printing calculator eliminates the need for manual time calculations, enhancing accuracy in complex calculations.
- Scheduling and Planning: The built-in clock can serve as a simple scheduling tool. Users can set reminders or alarms for important events or deadlines related to financial operations. This feature helps individuals and businesses stay organized, ensuring timely payments, billings, or other transactions.
- Display and Navigation: The built-in clock might provide additional functionalities beyond just telling time, such as serving as a reference for setting time-specific operations or configuring the calculator's settings. It can act as a reference point for navigation within the calculator's menu or programming options.
Overall, the built-in clock on a printing calculator offers convenience, accuracy, efficiency, and organization in time-sensitive financial calculations and transactions.
What happens if the date and time are not set correctly on a printing calculator?
If the date and time are not set correctly on a printing calculator, it can lead to several issues:
- Incorrect timestamp: The printed receipts or calculations may display an inaccurate date and time, which can create confusion and cause difficulty in record-keeping.
- Inaccurate calculations: Some printing calculators have built-in time-dependent functions, such as compound interest calculations or time-based discounts. If the date and time are incorrect, these functions may produce incorrect results.
- Inconvenience for auditing: In business or financial settings, accurate date and time stamps are crucial for auditing and tracking transactions. Incorrect timestamps on receipts can make it difficult to identify when a specific transaction occurred.
- Misalignment of records: If the time on the calculator does not match the actual time, it can create discrepancies between the printed records and the actual events. This misalignment can lead to confusion and make it harder to reconcile accounts or locate specific transactions.
- Lack of synchronization with other systems: In situations where the printing calculator is integrated with other systems, such as cash registers or inventory management software, inaccurate date and time settings can cause issues with data synchronization and make it challenging to maintain accurate records across different systems.
Overall, it is essential to set the correct date and time on a printing calculator to ensure accurate and consistent reporting, calculations, and record-keeping.
How to troubleshoot issues with date and time on a printing calculator?
Here are some steps you can take to troubleshoot issues with the date and time on a printing calculator:
- Check the power source: Ensure that the calculator is connected to a reliable power source. If it is battery-operated, try replacing the batteries with fresh ones.
- Set the correct date and time: Review the user manual to understand the procedure for setting the date and time on your specific calculator model. Follow the instructions carefully to ensure you are setting the correct values.
- Check the print roller or ink ribbon: Over time, the print roller or ink ribbon can degrade or become dirty, which can affect the printing quality and can result in illegible dates and times. Inspect the print roller or ink ribbon and replace it if necessary.
- Clean the buttons: If some keys are not functioning properly, it may affect the date and time setting process. Clean the calculator's buttons using compressed air or a soft cloth to remove any debris or dust buildup.
- Reset the calculator: If the previous steps didn't work, you can try performing a reset on the calculator. Look for a small reset button or refer to the user manual to identify the appropriate method for resetting the calculator.
- Contact customer support: If none of the above steps resolve the issue, it may be necessary to contact the manufacturer's customer support team. They can provide further guidance or determine if there is a hardware problem that requires professional repair.