
Best Scanners to Buy in July 2026
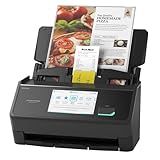
ScanSnap iX2500 Wireless or USB High-Speed Cloud Enabled Document, Photo & Receipt Scanner with Large 5" Touchscreen and 100 Page Auto Document Feeder for Mac or PC, Black
- FAST 45PPM SCANNING WITH 100-SHEET FEEDER FOR EFFICIENT WORKFLOWS.
- CUSTOMIZABLE PROFILES FOR QUICK ACCESS TO YOUR FAVORITE APPS.
- SECURE WI-FI 6 CONNECTIVITY FOR SEAMLESS SMART DEVICE INTEGRATION.


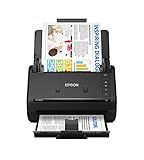
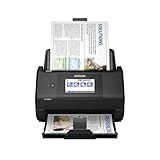
Epson Workforce ES-400 II Color Duplex Desktop Document Scanner for PC and Mac with Auto Doc Feeder (ADF), Image Adjustment Tools
-
SPEED UP SCANNING: 50-SHEET AUTO FEEDER FOR RAPID DOCUMENT PROCESSING.
-
STREAMLINE WORKFLOW: INTUITIVE SOFTWARE FOR EASY PREVIEWS AND FILE MANAGEMENT.
-
EFFORTLESS SHARING: DIRECTLY SCAN TO EMAIL OR POPULAR CLOUD SERVICES.
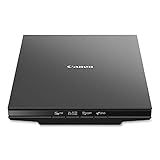
Canon Canoscan Lide 300 Scanner (PDF, AUTOSCAN, Copy, Send)
- EFFORTLESSLY DIGITIZE DOCUMENTS WITH AUTO SCAN MODE.
- FAST USB CONNECTIVITY FOR SEAMLESS INTEGRATION.
- VERSATILE SCANNING FOR BOTH DOCUMENTS AND IMAGES.
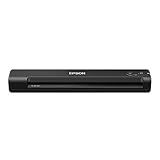
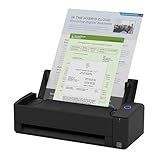
Epson WorkForce ES-50 Portable Sheet-Fed Document Scanner for PC and Mac
-
ULTRA-FAST SCANNING: CAPTURE DOCUMENTS IN JUST 5.5 SECONDS EACH!
-
PORTABLE DESIGN: LIGHTWEIGHT AND COMPACT FOR ON-THE-GO CONVENIENCE.
-
VERSATILE FORMATS: SCAN VARIOUS SIZES, INCLUDING ID CARDS AND RECEIPTS.
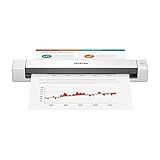
Brother DS-640 Compact Mobile Document Scanner, (Model: DS640)
-
BLAZING SPEEDS: SCAN UP TO 16PPM, NO SLOWDOWN FOR COLOR DOCUMENTS!
-
ULTRA COMPACT: FITS ANYWHERE-1.5LBS, LESS THAN 1 FOOT LONG!
-
READY ANYTIME: USB-POWERED FOR HASSLE-FREE SCANNING ON-THE-GO!
Epson Workforce ES-580W Wireless Color Duplex Tax Receipt & Desktop Document Scanner for PC and Mac with 100-sheet Auto Feeder (ADF), Intuitive 4.3' Touchscreen
- EFFORTLESSLY SCAN TO DEVICES OR CLOUD WITH A 4.3 TOUCHSCREEN.
- SAVE TIME WITH 35PPM DIGITIZATION AND 100-SHEET AUTO DOCUMENT FEEDER.
- NO COMPUTER NEEDED: SAVE DIRECTLY TO USB, EMAIL, OR CLOUD SERVICES.
ScanSnap iX1300 Compact Wireless or USB Double-Sided Color Document, Photo & Receipt Scanner with Auto Document Feeder and Manual Feeder for Mac or PC, Black
- SAVE SPACE WITH A COMPACT DESIGN-PERFECT FOR ANY DESK SETUP!
- EFFORTLESSLY SCAN ALL TYPES OF DOCUMENTS, INCLUDING CARDS AND PHOTOS!
- FAST, HIGH-QUALITY SCANNING WITH A SINGLE TOUCH-NO EXPERIENCE NEEDED!
Flatbed and sheet-fed scanners are both devices used to digitize physical documents and images, but they operate in different ways and are suited for different types of scanning tasks. A flatbed scanner features a flat, glass surface where you place documents or images face down. The scanning mechanism, typically a moving optical array, passes beneath the glass to capture the image. This design allows for the scanning of a wide variety of document sizes and thicknesses, including books, magazines, and fragile or irregularly shaped items. In contrast, a sheet-fed scanner processes documents via an automatic document feeder (ADF). The documents are fed into the scanner, typically one at a time, by the ADF, and a fixed scanning module captures the images as the paper passes through. While sheet-fed scanners are usually faster for multi-page documents and are more suitable for high-volume scanning tasks, they are generally less flexible than flatbeds since they require documents to be of a uniform size and in good condition. Overall, the choice between the two types depends on the specific needs, including the variety of documents to be scanned and the volume and frequency of scanning tasks.
What is a barcode scanner?
A barcode scanner is a device used to read and interpret the information encoded in barcodes, which are visual patterns consisting of parallel lines or other shapes that represent data. These scanners capture the data encoded in the barcode and then transmit it to a computer or other digital system for processing.
There are several types of barcode scanners, including:
- Laser Scanners: These use laser beams to read the barcode. They are widely used because they can scan barcodes from a distance and at various angles.
- CCD (Charge-Coupled Device) Scanners: These use an array of tiny light sensors to capture the barcode image. They typically require the scanner to be close to the barcode.
- Linear Imagers: Similar to CCD scanners, linear imagers capture an image of the barcode, but can often read at further distances than standard CCD scanners.
- 2D Area Imagers: These can read both 1D and 2D barcodes, like QR codes. They capture a picture of the barcode, which allows for more flexible and versatile reading capabilities.
- Pen-Type Scanners: These are handheld devices that must be swiped across the barcode to read it. They are less common due to their limited convenience compared to other types.
Barcode scanners are used in various industries, including retail, logistics, healthcare, and manufacturing, for tasks such as inventory management, point-of-sale transactions, and product tracking.
How to digitize old photos using a scanner?
Digitizing old photos using a scanner is a great way to preserve them and make them more accessible. Here’s a step-by-step guide to help you through the process:
- Gather Materials: A flatbed scanner with good resolution capabilities. A computer with scanner software. Microfiber cloth or a similar non-abrasive cloth for cleaning. Optional: gloves to handle photos if they are particularly delicate.
- Prepare the Photos: Make sure your hands are clean or wear gloves to prevent oils from transferring onto the photos. Remove any dust or debris from the photos and the scanner bed using a clean, dry microfiber cloth.
- Set Up the Scanner: Install any necessary scanner software if it isn't already on your computer. Turn on the scanner and connect it to your computer.
- Select Scanning Settings: Open the scanner software on your computer. Choose the resolution. A good starting point is 300 DPI (dots per inch) for standard use, but for archiving or high-quality prints, 600 DPI or higher is recommended. Select the color setting: Color for colored photos, Grayscale for black and white photos. Choose the file format. JPEG is common for typical use due to its balance of quality and file size. For archival purposes, consider using TIFF, which is lossless but results in larger files.
- Place the Photo on the Scanner: Open the scanner lid and place the photo face-down on the scanner bed. Align it with the corner or the guidelines provided on the scanner.
- Start Scanning: Use the scanner software to preview the scan and adjust settings as needed. Once satisfied with the preview, proceed to scan the photo.
- Review and Edit (Optional): Check the scanned image on your computer. Use photo editing software (like Adobe Photoshop, GIMP, or Lightroom) to enhance the photo if necessary, such as adjusting brightness, contrast, removing dust or scratches, and cropping.
- Save and Organize: Save the scanned image in your preferred format and resolution. Rename the file meaningfully to make it easier to find later, such as including the date or event. Organize the files into folders that make sense for your collection, like by year or event.
- Backup: Consider backing up your digital copies onto an external hard drive, cloud storage, or another backup solution to ensure they are preserved in case of computer failure.
By following these steps, you can effectively digitize your old photos and keep them preserved for future generations.
What is a film scanner?
A film scanner is a device designed to convert film photographs into digital images. It works by passing a strip of film, which can be negatives or slides, through a scanner that captures the image information and converts it into a digital file. This process allows for the preservation, editing, and sharing of images that were originally shot on film.
Film scanners come in different types and sizes, including:
- Flatbed Scanners with Transparency Units: These are versatile scanners that can handle both documents and film. They often come with a special backlight or transparency adapter to scan film.
- Dedicated Film Scanners: These are specifically designed for scanning various film formats such as 35mm and medium format. They generally offer higher resolution and better color reproduction compared to flatbed scanners with transparency units.
- Drum Scanners: These are high-end scanners typically used by professionals. They offer superior image quality by mounting the film on a rotating drum and using photomultiplier tubes for image capture.
Film scanners are valuable tools for photographers who wish to digitize their film archives, preserve old photos, or edit film images using digital software.
How to scan a document to email?
Scanning a document to email typically involves using a scanner or a multifunction printer that has scanning capabilities. Here's a step-by-step guide to help you do this:
Using a Scanner or Multifunction Printer:
- Prepare the Document: Place the document you want to scan face down on the scanner glass. If your device has an automatic document feeder (ADF), you can place multiple pages in the feeder.
- Select Scan Mode: On the scanner or printer's control panel, select the "Scan" function. You might need to navigate through a menu to find the scan option.
- Choose Scan Type: Select the type of scan based on your needs: Black & White: For text documents. Color: For color documents or photos. Resolution: Choose a resolution. 300 DPI is typically sufficient for most documents.
- Scan Destination: You can either: Send the scan directly to your email from the scanner (if it supports email functionality). Save the scan to your computer and then email it manually.
Sending from the Scanner (if supported):
- Enter Email on Scanner: If your scanner supports emailing directly, it will prompt you to enter the recipient's email address. You may also need to enter your own email address as the sender.
- Configure Email Settings: Some devices need configuration with your email service. Check the device's manual to set up the email by inputting the required SMTP details.
- Send the Email: Once everything is set, confirm and let the scanner process and send the email.
Saving to Computer and Emailing:
- Scan to Computer: Use the scanner's software on your computer to initiate the scan. Select the format (PDF is usually preferred) and the location to save the file.
- Open Your Email Client: Open your email program or web-based email service (like Gmail, Outlook, etc.).
- Compose a New Email: Attach the scanned document file saved on your computer by clicking on the "Attach" or "Paperclip" icon.
- Send the Email: Enter the recipient's email address, add a subject, and any message you'd like to include, then send the email.
Mobile Apps for Scanning:
If you don’t have a scanner, you can use a smartphone with a scanning app like Adobe Scan, Microsoft Office Lens, or Google Drive:
- Download a Scanning App: Choose and install a scanning app from your app store.
- Scan the Document: Open the app and follow instructions to take pictures of your document. The app will convert these into a scanned PDF.
- Share via Email: Once scanned, use the app's sharing feature to send the document to your email address directly.
These general instructions should cover most scenarios, but always refer to your specific device's manual for detailed instructions tailored to your hardware.