
Best Document Scanners to Buy in July 2026
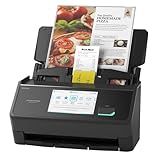
ScanSnap iX2500 Wireless or USB High-Speed Cloud Enabled Document, Photo & Receipt Scanner with Large 5" Touchscreen and 100 Page Auto Document Feeder for Mac or PC, Black
- FAST 45PPM DOUBLE-SIDED SCANNING WITH LARGE TOUCHSCREEN EASE.
- INSTANTLY CUSTOMIZABLE PROFILES FOR SEAMLESS DOCUMENT SHARING.
- WI-FI 6 ENSURES FAST, SECURE CONNECTIONS WITHOUT A COMPUTER.


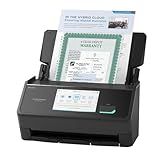
ScanSnap iX2500 Premium Wireless or USB High-Speed Cloud Enabled Document, Photo & Receipt Scanner with Large 5" Touchscreen for Mac or PC, Includes 4-Year Protection Plan
- FAST 45PPM SCANNING: DOUBLE-SIDED SCANNING BOOSTS PRODUCTIVITY EFFORTLESSLY.
- PREMIUM 4-YEAR PROTECTION: ENJOY PEACE OF MIND FROM DAY ONE.
- ADVANCED WI-FI 6 CONNECTIVITY: RELIABLE & SECURE CONNECTIONS FOR SEAMLESS USE.
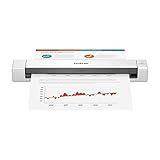
Brother DS-640 Compact Mobile Document Scanner, (Model: DS640) 1.5"x2"x11.9"
- FAST SCANNING: 16 PPM SCAN SPEEDS FOR QUICK DOCUMENT PROCESSING.
- PORTABLE DESIGN: LIGHTWEIGHT AND COMPACT FOR ON-THE-GO PROFESSIONALS.
- VERSATILE COMPATIBILITY: EASY SCANNING TO MULTIPLE DESTINATIONS AND DEVICES.

Canon imageFORMULA R40 - Office Document Scanner, Windows and Mac, Duplex Scanning, Easy Setup, Scans a Wide Variety of Documents, Scans to Cloud
- QUICKLY CONVERT DOCUMENTS TO SEARCHABLE DIGITAL FORMATS-STAY ORGANIZED!
- DUAL-SIDE SCANNING UP TO 80 IPM SAVES TIME AND BOOSTS PRODUCTIVITY.
- EASY SETUP WITH USB CONNECTION AND BUNDLED SOFTWARE FOR SEAMLESS USE.
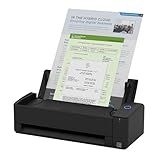
ScanSnap iX1300 Compact Wireless or USB Double-Sided Color Document, Photo & Receipt Scanner with Auto Document Feeder and Manual Feeder for Mac or PC, Black
-
SPACE-SAVING DESIGN: ELIMINATE CLUTTER AND MAXIMIZE DESK SPACE EFFORTLESSLY.
-
VERSATILE SCANNING: SCAN DOCUMENTS, PHOTOS, AND CARDS WITH EASE AND PRECISION.
-
USER-FRIENDLY EXPERIENCE: FAST SCANNING WITH NO SETUP NEEDED FOR STUNNING RESULTS.
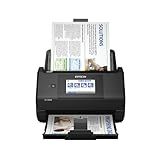
Epson Workforce ES-580W Wireless Color Duplex Desktop Document Scanner for PC and Mac with 100-sheet Auto Document Feeder (ADF) and Intuitive 4.3" Touchscreen
- EFFORTLESS WIRELESS SCANNING TO DEVICES & CLOUD-NO COMPUTER NEEDED!
- FAST 35 PAGES/MIN FOR QUICK DIGITIZATION AND EFFICIENT ORGANIZATION.
- CREATE SEARCHABLE PDFS & EDITABLE FILES WITH EASY OCR TECHNOLOGY.
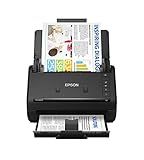
Epson Workforce ES-400 II Color Duplex Desktop Document Scanner for PC and Mac, with Auto Document Feeder (ADF) and Image Adjustment Tools, ES-400 II
-
FAST SCANNING: 50-SHEET FEEDER STREAMLINES OFFICE AND HOME WORKFLOWS.
-
SMART SOFTWARE: PREVIEW, UPLOAD, AND AUTO-NAME FILES WITH EASE.
-
EASY SHARING: DIRECT SCANS TO EMAIL & CLOUD SERVICES FOR QUICK ACCESS.
ScanSnap iX2500 Wireless or USB High-Speed Cloud Enabled Document, Photo & Receipt Scanner with Large 5" Touchscreen and 100 Page Auto Document Feeder for Mac or PC, White
- FAST 45PPM SCANNING: BOOST PRODUCTIVITY WITH DOUBLE-SIDED SPEED.
- CUSTOM PROFILES & SHARING: EFFORTLESSLY CONNECT TO ALL YOUR DEVICES.
- STABLE WIRELESS CONNECTION: ENJOY SECURE, HASSLE-FREE SCANNING ANYTIME.
Document scanners significantly enhance document management by transforming physical documents into digital formats, which streamlines storage, accessibility, and retrieval processes. With the ability to convert paper documents into searchable digital files, scanners facilitate a more organized and efficient document management system. This digital transformation helps reduce physical storage needs, minimizing clutter and saving office space. Additionally, digital documents are easier to share and collaborate on among teams, improving workflow efficiency. Scanners equipped with optical character recognition (OCR) technology further enhance functionality by allowing text within scanned documents to be searchable and editable. This capability speeds up information retrieval and reduces the time spent manually searching through files. Moreover, digital documents can be easily backed up, ensuring data security and protection against loss due to physical damage. Scanning technology also aids in compliance with data management regulations by allowing better control over document access and distribution. Overall, document scanners are vital tools in optimizing document management, promoting a paperless environment, and improving operational productivity.
How to troubleshoot common scanner issues?
Troubleshooting a scanner can often resolve common issues without the need for professional repair. Here are some steps you can take to diagnose and fix scanner problems:
- Check Connections: Ensure that the scanner is properly connected to your computer via USB, network, or wireless connection. Try a different USB port or cable if you're using a wired connection.
- Restart and Power Cycle: Restart your computer and turn the scanner off and then back on. This can resolve temporary glitches.
- Update or Reinstall Drivers: Go to the scanner manufacturer’s website to download and install the latest drivers for your model. Uninstall the existing driver and then reinstall it to ensure it's correctly set up.
- Check Software Settings: Verify that the scanning software is properly installed. Open the scanner utility software to ensure the scanner is selected as the input device.
- Test Using Another Program: Try scanning using a different software application to rule out software-specific issues.
- Check for Error Messages: Look for any error messages displayed on the scanner or your computer that might give clues about the issue.
- Run a Diagnostic Test: Many scanners come with built-in diagnostic tools or software for troubleshooting. Run these to identify potential issues.
- Adjust Scanner Resolution Settings: Lower the scan resolution in the software, as very high resolution can sometimes cause scanning issues.
- Inspect and Clean the Scanner: Open the scanner lid and ensure the glass is clean and free from dust or smudges. Check for any obstructions or mechanical issues inside the scanner.
- Network and Firewall Settings: If using a network scanner, ensure it is properly connected to your network and has an IP address. Check firewall settings that might be blocking communication.
- Check Power Supply: Confirm the scanner is receiving power; verify that the power cord is securely connected.
- Look for Firmware Updates: Manufacturers occasionally release firmware updates that can fix bugs or enhance performance.
- Consult the Manual: Refer to the user manual for the scanner for model-specific troubleshooting steps.
If none of these steps work, you may need to contact the manufacturer’s support for further assistance or consider a professional repair service.
How to scan documents directly to the cloud?
Scanning documents directly to the cloud can streamline document management and ensure easy access and sharing. Here’s a general guide to scanning documents directly to the cloud:
- Choose a Cloud Service: Select a reliable cloud storage service such as Google Drive, Dropbox, Microsoft OneDrive, or iCloud, depending on your preferences and needs.
- Check Your Scanner Compatibility: Ensure your scanner supports direct scanning to cloud services. Many modern scanners come with built-in features that support cloud connectivity.
- Install Required Software: Install any necessary software or apps associated with your scanner. This could be the manufacturer's app or third-party apps that facilitate cloud scanning.
- Set Up the Scanner: Connect your scanner to your Wi-Fi network if it’s a Wi-Fi-enabled device. Access the scanner’s settings via its control panel or accompanying software to configure cloud accounts.
- Link to Cloud Account: Using the scanner’s software or control panel, find the option to connect or link your cloud account. You may need to log in to your cloud account to grant access permissions. Save the authentication or connection, if required.
- Configure Scan Settings: Choose your preferred scanning settings, such as resolution, color mode, and file format (PDF, JPEG, etc.). Specify whether you want the documents to be stored in a particular folder within your cloud storage.
- Scan the Document: Place the document you want to scan into the scanner. Initiate the scan through the scanner’s interface or the scanning software on your computer or mobile device. Select the option to scan directly to the cloud.
- Verify Cloud Upload: After the scan is complete, verify that the document has been uploaded to your cloud storage by checking the designated folder.
- Mobile Device Scan Option: If your scanner does not support direct cloud scanning, consider using a scanning app on your smartphone. Apps like Adobe Scan, Microsoft Office Lens, or the built-in Notes app on iOS devices can scan documents and upload them to the cloud.
- Automation and Integration: Explore if there are automation options available, such as linking your scans to task management tools or setting up automatic backups to further optimize your workflow.
By setting up and using these steps, you can effectively scan and store your documents in the cloud for easy access and backup.
How do you maintain a document scanner for optimal performance?
Maintaining a document scanner for optimal performance involves a combination of regular cleaning, proper handling, software updates, and careful storage. Here are some steps you can follow:
- Regular Cleaning: Exterior Cleaning: Use a soft, lint-free cloth slightly dampened with water or a mild cleaning solution to wipe the exterior of the scanner. Avoid using solvents or harsh chemicals. Glass Cleaning: Clean the scanner glass or platen with an anti-static cloth or lens cleaning wipe to remove dust, smudges, and fingerprints. Make sure the glass is completely dry before using the scanner. Internal Cleaning: Most scanners come with a cleaning sheet or a cleaning cycle. Follow the manufacturer’s instructions for cleaning rollers and other internal parts. This is often necessary to prevent jams and ensure smooth feeding of documents.
- Regular Maintenance Checks: Inspection: Regularly check for signs of wear, such as worn rollers or belts, and replace them as needed. Calibration: Some scanners require periodic calibration to maintain accuracy. Refer to the scanner’s manual for details on how to perform this.
- Software and Firmware Updates: Keep your scanner’s software and drivers up to date to ensure compatibility with your operating system and to benefit from performance improvements or new features provided by the manufacturer.
- Proper Handling: Handle documents carefully to avoid feeding damaged or stapled sheets that could jam or damage the scanner. Use protective sleeves for documents that are fragile or unusually sized to prevent damage or jams.
- Optimal Environment: Position the scanner on a stable, flat surface to prevent any vibrations that could affect the scanning process. Avoid placing the scanner near sources of dust, humidity, or extreme temperatures, as these can affect performance and longevity.
- Storage: If you need to move or store the scanner for a period, ensure it’s protected from dust and moisture. Most manufacturers provide dust covers or recommend using a protective case.
- Use Genuine Parts and Accessories: Use only genuine replacement parts and accessories recommended by the manufacturer to avoid compatibility issues and maintain the quality of the scans.
By following these steps, you can help ensure your document scanner remains in excellent working condition, providing reliable and high-quality scans. Regular maintenance will also extend the lifespan of your scanner, making it a more worthwhile investment.