
Best PoE Switches to Buy in July 2026
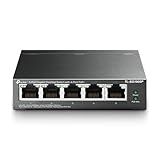
TP-Link TL-SG1005P, 5 Port Gigabit PoE Switch, 4 PoE+ Ports @65W, Desktop, Plug & Play, Sturdy Metal w/ Shielded Ports, Fanless, QoS & IGMP Snooping
- FLEXIBLE POE CONFIGURATION: 4X POE+ PORTS WITH 65W TOTAL POWER BUDGET.
- SIMPLE SETUP: ENJOY HASSLE-FREE, PLUG-AND-PLAY INSTALLATION.
- DURABLE DESIGN & SUPPORT: STURDY METAL CASE + 3-YEAR WARRANTY INCLUDED.


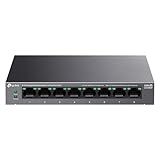
TP-Link LS108GP | 8 Port PoE Gigabit Ethernet Switch | 8 PoE+ Port @ 62W | Plug & Play | Extend Mode | PoE Auto Recovery | Desktop/Wall Mount | Silent Operation
- UP TO 30W PER PORT, 65W TOTAL FOR MULTIPLE DEVICES.
- EXTEND POE UP TO 820 FT FOR VAST COVERAGE FLEXIBILITY.
- AUTO-RECOVERY FOR SEAMLESS OPERATIONS AND DOWNTIME REDUCTION.
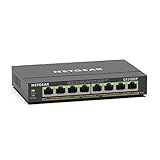
NETGEAR 8 Port PoE Gigabit Ethernet Easy Smart Managed Essentials Switch (GS308EP) - with 8 x PoE+ @ 62W, Desktop or Wall Mount
- 8 GIGABIT AND POE+ PORTS FOR HIGH-SPEED, POWERED CONNECTIVITY.
- USER-FRIENDLY SOFTWARE FOR EASY NETWORK MANAGEMENT AND MONITORING.
- VERSATILE PLACEMENT OPTIONS WITH A 3-YEAR LIMITED HARDWARE WARRANTY.
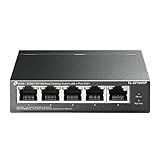
TP-Link TL-SF1005P | 5 Port Fast Ethernet PoE Switch | 4 PoE+ 10/100 Mbps Ports @67W | Desktop | Plug & Play | Sturdy Metal w/ Shielded Ports | Fanless | Extend & Priority Mode
-
FLEXIBLE 5-PORT POE CONFIGURATION: 4 POEPLUS PORTS WITH 67W MAX!
-
HASSLE-FREE SETUP: PLUG AND PLAY; NO EXTRA SOFTWARE NEEDED!
-
POE AUTO RECOVERY: AUTOMATICALLY REBOOTS UNRESPONSIVE DEVICES!
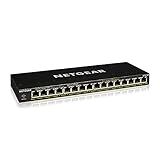
NETGEAR 16-Port PoE+ Gigabit Ethernet Unmanaged Essentials Switch (GS316P) - with 16 x PoE+ @ 115W, Desktop or Wall Mount
- 16 POE+ PORTS WITH 115W POWER: POWER YOUR DEVICES EFFORTLESSLY.
- PLUG-AND-PLAY SETUP: NO SOFTWARE NEEDED FOR INSTANT CONNECTIVITY.
- SILENT OPERATION: PERFECT FOR NOISE-SENSITIVE ENVIRONMENTS.
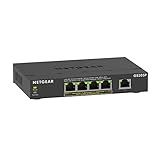
NETGEAR 5-Port PoE Gigabit Ethernet Unmanaged Essentials Switch (GS305P) - with 4 x PoE+ @ 63W, Desktop or Wall Mount
- 5 GIGABIT PORTS FOR LIGHTNING-FAST NETWORK CONNECTIVITY.
- 4 POE+ PORTS DELIVERING 63W TOTAL POWER BUDGET.
- PLUG-AND-PLAY SETUP FOR HASSLE-FREE INSTALLATION.
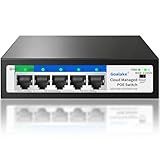
5-Port Ethernet PoE Switch (4 PoE Ports, 1 Uplink) with Extend Function, Easy Smart Managed Ethernet Switch, Plug & Play, Fanless Metal Design, VLAN, Qos,Desktop/Wall Mount
-
EFFORTLESS MANAGEMENT: CONTROL YOUR NETWORK VIA APP OR WEB INTERFACE.
-
SUPERIOR POE POWER: DELIVER UP TO 30W PER PORT FOR RELIABLE DEVICE SUPPORT.
-
COST-EFFECTIVE SOLUTION: ENJOY CLOUD MANAGEMENT WITHOUT HIGH SETUP COSTS.
Power over Ethernet (PoE) switches are an ideal solution for efficiently connecting and powering network devices such as IP cameras, VoIP phones, and wireless access points. Whether you’re setting one up in a home or office setting, this guide will walk you through the process of installing a PoE switch. We’ll cover everything from selecting the right switch to connecting your devices.
What is a PoE Switch?
A PoE switch is a networking switch that has the capability to pass electrical power along with data on Ethernet cabling. This means that devices connected to the switch do not require separate power supplies, which simplifies installations and reduces cable clutter.
Benefits of Using a PoE Switch
- Simplified Cabling: PoE eliminates the need for power outlets close to network devices.
- Scalability: Easily add and relocate devices without concern for additional electrical wiring.
- Cost Efficiency: Reduces wiring costs and saves on electrical consumption.
How to Choose the Right PoE Switch
When selecting a PoE switch, consider the following:
- Port Count: Match your device needs-choose switches with sufficient ports for your setup.
- Power Budget: Ensure that the switch can supply the necessary power to all connected devices.
- Speed Requirements: Look for switches that support the desired network speed (e.g., Gigabit Ethernet).
- Management Features: Decide between managed switches for advanced control or unmanaged for simplicity.
Installation Guide
Step 1: Gather Your Equipment
Before starting the installation, ensure you have the following:
- PoE switch
- Ethernet cables
- Devices to be connected (e.g., cameras, VoIP phones)
- Network router
Step 2: Choose the Location
Select a central location for the PoE switch to maximize cable reach and performance. Ensure the environment is well-ventilated to prevent overheating.
Step 3: Connect the PoE Switch to the Network
- Connect to Router: Use an Ethernet cable to connect one of the PoE switch’s uplink ports to your network router.
- Power On the Switch: Plug the PoE switch into a power outlet.
Step 4: Connect Devices to the PoE Switch
- Direct Connection: Use Ethernet cables to connect your PoE-enabled devices directly to the switch’s ports.
- Verify Functionality: Confirm that each device powers on and connects successfully to the network.
Step 5: Configuration (If Using a Managed Switch)
- Access Switch Settings: Use a web browser or command-line interface to log into the switch.
- Set Up VLANs: Configure VLANs if necessary for network segmentation.
- Apply Security Features: Enable security measures like 802.1X authentication or port security.
Conclusion
Installing a PoE switch can greatly enhance the flexibility and efficiency of your home or office network. By following these steps, you’ll ensure a smooth setup and improve your network’s connectivity.
For enhancing your network security or exploring more about networking solutions, you may also be interested in the following resources:
- Check out the latest VPN router sales for securing your internet connections.
- Learn how to optimize routing in web applications by using React Router.
- Explore the best wireless routers for seamless connectivity solutions.
By leveraging the right tools and technologies, you can create a robust networking environment tailored to your needs.