
Best Document Scanners for Home Use to Buy in July 2026
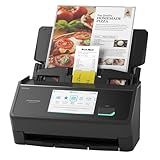
ScanSnap iX2500 Wireless or USB High-Speed Cloud Enabled Document, Photo & Receipt Scanner with Large 5" Touchscreen and 100 Page Auto Document Feeder for Mac or PC, Black
- FAST 45PPM SCANNING + 100-SHEET FEEDER BOOSTS PRODUCTIVITY!
- CUSTOM PROFILES & QUICK MENU FOR EFFORTLESS DOCUMENT SHARING!
- WI-FI 6 & USB-C ENSURE STABLE, SECURE CONNECTIONS!


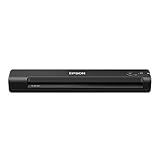
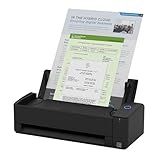
Epson WorkForce ES-50 Portable Sheet-Fed Document Scanner for PC and Mac
-
ULTRA-FAST SCANNING: CAPTURE PAGES IN JUST 5.5 SECONDS!
-
PORTABILITY: LIGHTWEIGHT DESIGN FOR EASY ON-THE-GO SCANNING.
-
VERSATILE HANDLING: SCAN DOCUMENTS, ID CARDS, AND RECEIPTS UP TO 72 INCHES.
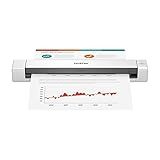
Brother DS-640 Compact Mobile Document Scanner, (Model: DS640)
-
FAST SCANNING: 16PPM FOR BOTH COLOR AND BLACK & WHITE DOCUMENTS.
-
ULTRA COMPACT DESIGN: FITS ANYWHERE, WEIGHING JUST 1.5LBS.
-
POWER ANYWHERE: MICRO USB 3.0 ENABLES SCANNING WITHOUT OUTLETS.
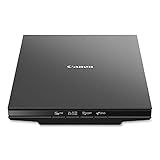
Canon Canoscan Lide 300 Scanner (PDF, AUTOSCAN, Copy, Send)
- EFFORTLESS SCANNING WITH AUTO SCAN MODE FOR QUICK DOCUMENT DETECTION.
- USB CONNECTIVITY ENSURES EASY SETUP AND INSTANT USE.
- PERFECT FOR DIGITIZING BOTH DOCUMENTS AND IMAGES SEAMLESSLY.
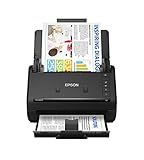
Epson Workforce ES-400 II Color Duplex Desktop Document Scanner for PC and Mac with Auto Doc Feeder (ADF), Image Adjustment Tools
- SPEEDY 50-SHEET ADF FOR QUICK, EFFICIENT DOCUMENT SCANNING.
- STREAMLINE WORKFLOWS WITH EASY CLOUD SHARING AND FILE MANAGEMENT.
- EFFORTLESS FILE CONVERSION TO SEARCHABLE PDFS AND EDITABLE FORMATS.
ScanSnap iX1300 Compact Wireless or USB Double-Sided Color Document, Photo & Receipt Scanner with Auto Document Feeder and Manual Feeder for Mac or PC, Black
- MAXIMIZE DESK SPACE WITH OUR COMPACT, INNOVATIVE DESIGN.
- EFFORTLESSLY SCAN DOCUMENTS, PHOTOS, AND CARDS IN SECONDS.
- CONNECT VIA USB OR WI-FI FOR FLEXIBLE, HASSLE-FREE SCANNING.
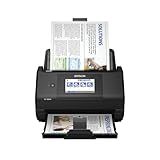
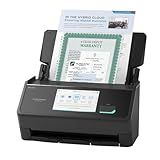
Epson Workforce ES-580W Wireless Color Duplex Tax Receipt & Desktop Document Scanner for PC and Mac with 100-sheet Auto Feeder (ADF), Intuitive 4.3' Touchscreen
-
EFFORTLESS WIRELESS SCANNING DIRECTLY TO YOUR DEVICES IN SECONDS.
-
100-SHEET AUTO DOCUMENT FEEDER FOR FAST, RELIABLE PAPER HANDLING.
-
SAVE TO USB OR CLOUD WITHOUT A COMPUTER-SIMPLIFY YOUR WORKFLOW!
ScanSnap iX2500 Premium Wireless or USB High-Speed Cloud Enabled Document, Photo & Receipt Scanner with Large 5" Touchscreen for Mac or PC, Includes 4-Year Protection Plan
-
PEACE OF MIND: ENJOY 4-YEAR PROTECTION FOR UNINTERRUPTED PRODUCTIVITY.
-
FAST & EFFICIENT: 45PPM DOUBLE-SIDED SCANNING WITH 100-SHEET FEEDER.
-
CUSTOMIZABLE SHARING: EASILY SEND SCANS TO DEVICES AND CLOUDS WITH A TOUCH.
ScanSnap iX2400 High-Speed Simple One-Touch Button Color Document, Photo & Receipt Scanner with 100 Page Auto Document Feeder for Mac or PC, Black
-
ONE-TOUCH SCANNING: 45 PAGES/MINUTE, 100-SHEET CAPACITY!
-
EFFORTLESSLY SCAN & ORGANIZE PHOTOS, RECEIPTS, AND BUSINESS CARDS.
-
STABLE USB CONNECTION ENSURES RELIABLE PERFORMANCE EVERY TIME!
When searching for the best document scanner for home use, consider a few key factors to determine the right fit for your needs. A good home document scanner should balance performance, ease of use, and affordability. Look for a scanner that offers reliable scanning speeds and high-quality image resolution to ensure clear and crisp document captures. If you often work with larger volumes of paper, a scanner with an automatic document feeder (ADF) can save you time by processing multiple pages at once. Compact and lightweight designs are commonly preferred for home use due to limited space. Additionally, consider connectivity options, such as USB or wireless, and whether the scanner is compatible with your operating system and applications. Furthermore, user-friendly features like intuitive software interfaces or the ability to scan directly to cloud services can enhance your overall experience. Brands like Fujitsu, Brother, and Canon often receive positive reviews for producing reliable home scanners. Ultimately, the best choice will depend on your specific scanning needs, budget, and preferences.
What is a USB-powered scanner?
A USB-powered scanner is a type of scanner that connects to a computer or other device using a USB cable and draws power from the USB port for its operation, eliminating the need for an external power source. This makes USB-powered scanners particularly convenient for portable or compact applications, as they are easy to set up and use with laptops or desktop computers. They are commonly utilized for scanning documents, photos, and other media, serving both personal and professional needs. Additionally, these scanners are often designed to be compact and lightweight, enhancing their portability and ease of use.
How to enhance scanned document quality?
Enhancing the quality of a scanned document involves several steps that can improve readability, clarity, and appearance. Here are some methods to achieve better results:
- Rescan with Optimal Settings: Resolution: Scan at a higher DPI (dots per inch), typically 300 DPI for text documents and 600 DPI for images. Color Mode: Use grayscale for text-heavy documents and color for images or colored text. Paper Alignment: Ensure the document is aligned properly on the scanner to avoid skewing.
- Use Image Editing Software: Brightness/Contrast Adjustment: Increase contrast and adjust brightness to make text clearer. Sharpening: Enhance the edges of text and images to improve clarity. Despeckle/Noise Reduction: Remove spots or graininess to make the background cleaner. Levels/Curves: Adjust the tonal range and balance to enhance document visibility.
- Optical Character Recognition (OCR): Use OCR software to convert scanned images of text into editable and searchable text, which can significantly enhance usability.
- Correct Skew and Orientation: Use software features to straighten skewed scans and ensure correct document orientation.
- Remove Unwanted Borders: Crop out black edges or borders that may be present on scanned documents.
- Batch Processing: If handling multiple documents, use tools that offer batch processing capabilities to apply enhancements consistently across numerous files.
- Use Dedicated Enhancement Software: Consider software like Adobe Acrobat, ABBYY FineReader, or specialized enhancement tools that offer advanced features for improving scanned document quality.
- Manual Adjustments: For critical documents, making manual adjustments for areas like text density and background noise removal can be crucial for optimal quality.
- Use a Professional Scanner: Consider using a scanner designed for high-quality document reproduction, which can include features like automatic contrast enhancement and color correction.
These methods can significantly enhance the quality of scanned documents, making them clearer and more professional-looking.
How to organize scanned documents digitally?
Organizing scanned documents digitally requires a systematic approach to ensure that files are easy to find, access, and manage. Here are some steps to help you organize your scanned documents effectively:
- Choose the Right Format: Save scanned documents in widely-used formats like PDF or JPEG. PDFs are preferable for documents containing text, as they can support text recognition and are more versatile for sharing.
- Use File Naming Conventions: Develop a consistent file naming system that includes key information such as date, document type, and relevant details. For example, "2023-10-21_Invoice_CompanyX.pdf" can help you quickly identify the file content and date.
- Create a Folder Structure: Organize documents into a hierarchical folder system based on categories that suit your needs, such as by year, client, project, or document type. For example: 2023 Invoices Contracts Reports
- Implement Version Control: If documents undergo revisions, adopt a versioning system to track changes over time. This can be done by appending version numbers or dates to file names (e.g., "Proposal_v2.pdf").
- Use Metadata and Tags: Add metadata or tags to your documents to enhance searchability. Many software solutions allow you to add tags directly to files for better categorization and easier retrieval.
- Optical Character Recognition (OCR): Use OCR software to convert scanned images of text into editable and searchable formats. This allows you to search for specific text within documents.
- PDF Management Tools: Utilize PDF management tools to merge, split, annotate, or edit PDFs as needed, ensuring that documents are in the most useful format.
- Cloud Storage Solutions: Store documents in a cloud storage service like Google Drive, Dropbox, or OneDrive for easy access from anywhere. These services often include collaboration features and can serve as a backup.
- Regular Backups: Implement a backup solution to protect your digital documents from data loss. This can include local backups on external drives and cloud-based backups for redundancy.
- Access and Security Controls: Set appropriate access controls to ensure that only authorized persons can view or edit sensitive documents. Use encryption and password protection if necessary.
- Implement a Document Management System (DMS): Consider using a dedicated DMS for larger collections of documents, as these systems offer advanced features like indexing, workflow management, and audit trails.
- Regular Reviews and Clean-up: Periodically review and clean up your digital document collection to remove duplicates and obsolete files, keeping your system organized and efficient.
By following these steps, you can create a robust system for managing and organizing scanned documents digitally, ensuring quick retrieval and efficient document handling.
How to scan documents to PDF format?
Scanning documents to PDF format can be accomplished using a variety of methods, depending on the equipment and technology you have available. Here are some common methods:
Using a Standalone Scanner
- Install Scanner Software: Ensure that your scanner is connected to your computer and that the drivers and software are installed.
- Place Document: Open the scanner lid and place your document face down on the scanner glass.
- Open Scanning Software: Open the scanner software installed on your computer (such as Windows Fax and Scan or software provided by the scanner manufacturer).
- Select PDF Format: Set the file type to "PDF" in the settings. Adjust resolution and color preferences if necessary.
- Scan the Document: Click the scan button to start scanning. Once completed, preview the scanned document.
- Save as PDF: If satisfied, save the file to your desired location as a PDF.
Using a Multifunction Printer
- Access the Printer's Scan Functionality: Use the touchscreen or buttons on the printer to select the scan function.
- Select PDF Format: Choose PDF as the output format in the scanning settings.
- Place Document: Lay your document on the scanner glass or use the automatic document feeder (ADF) if available.
- Scan and Save: Initiate the scan process and follow the instructions to save the scanned file directly to your computer or send it via email.
Using a Mobile Device
iOS (iPhone/iPad)
- Open the Notes App: Create a new note or open an existing one.
- Use the Camera to Scan: Tap the camera icon and select "Scan Documents."
- Scan Document: Position your document in view of the camera. The app will automatically detect edges and scan.
- Save as PDF: Adjust corners if needed, and hit "Save." The document now exists in the Notes app as a PDF.
Android
- Use Google Drive: Open the Google Drive app and tap the "+" button.
- Select "Scan": Use the camera to scan the document.
- Adjust and Save: Adjust as necessary, then save. The scanned document is stored as a PDF in your Google Drive.
Using a Scanning App
- Download a Scanning App: Install a mobile scanning app like CamScanner, Adobe Scan, or Microsoft Office Lens.
- Open the App and Scan: Use the app to capture the document using your phone's camera.
- Adjust and Save: Most apps will automatically adjust lighting and corners. Save the document as a PDF to your device or cloud storage.
These methods should enable you to easily scan your documents and save them in a PDF format using different types of devices.